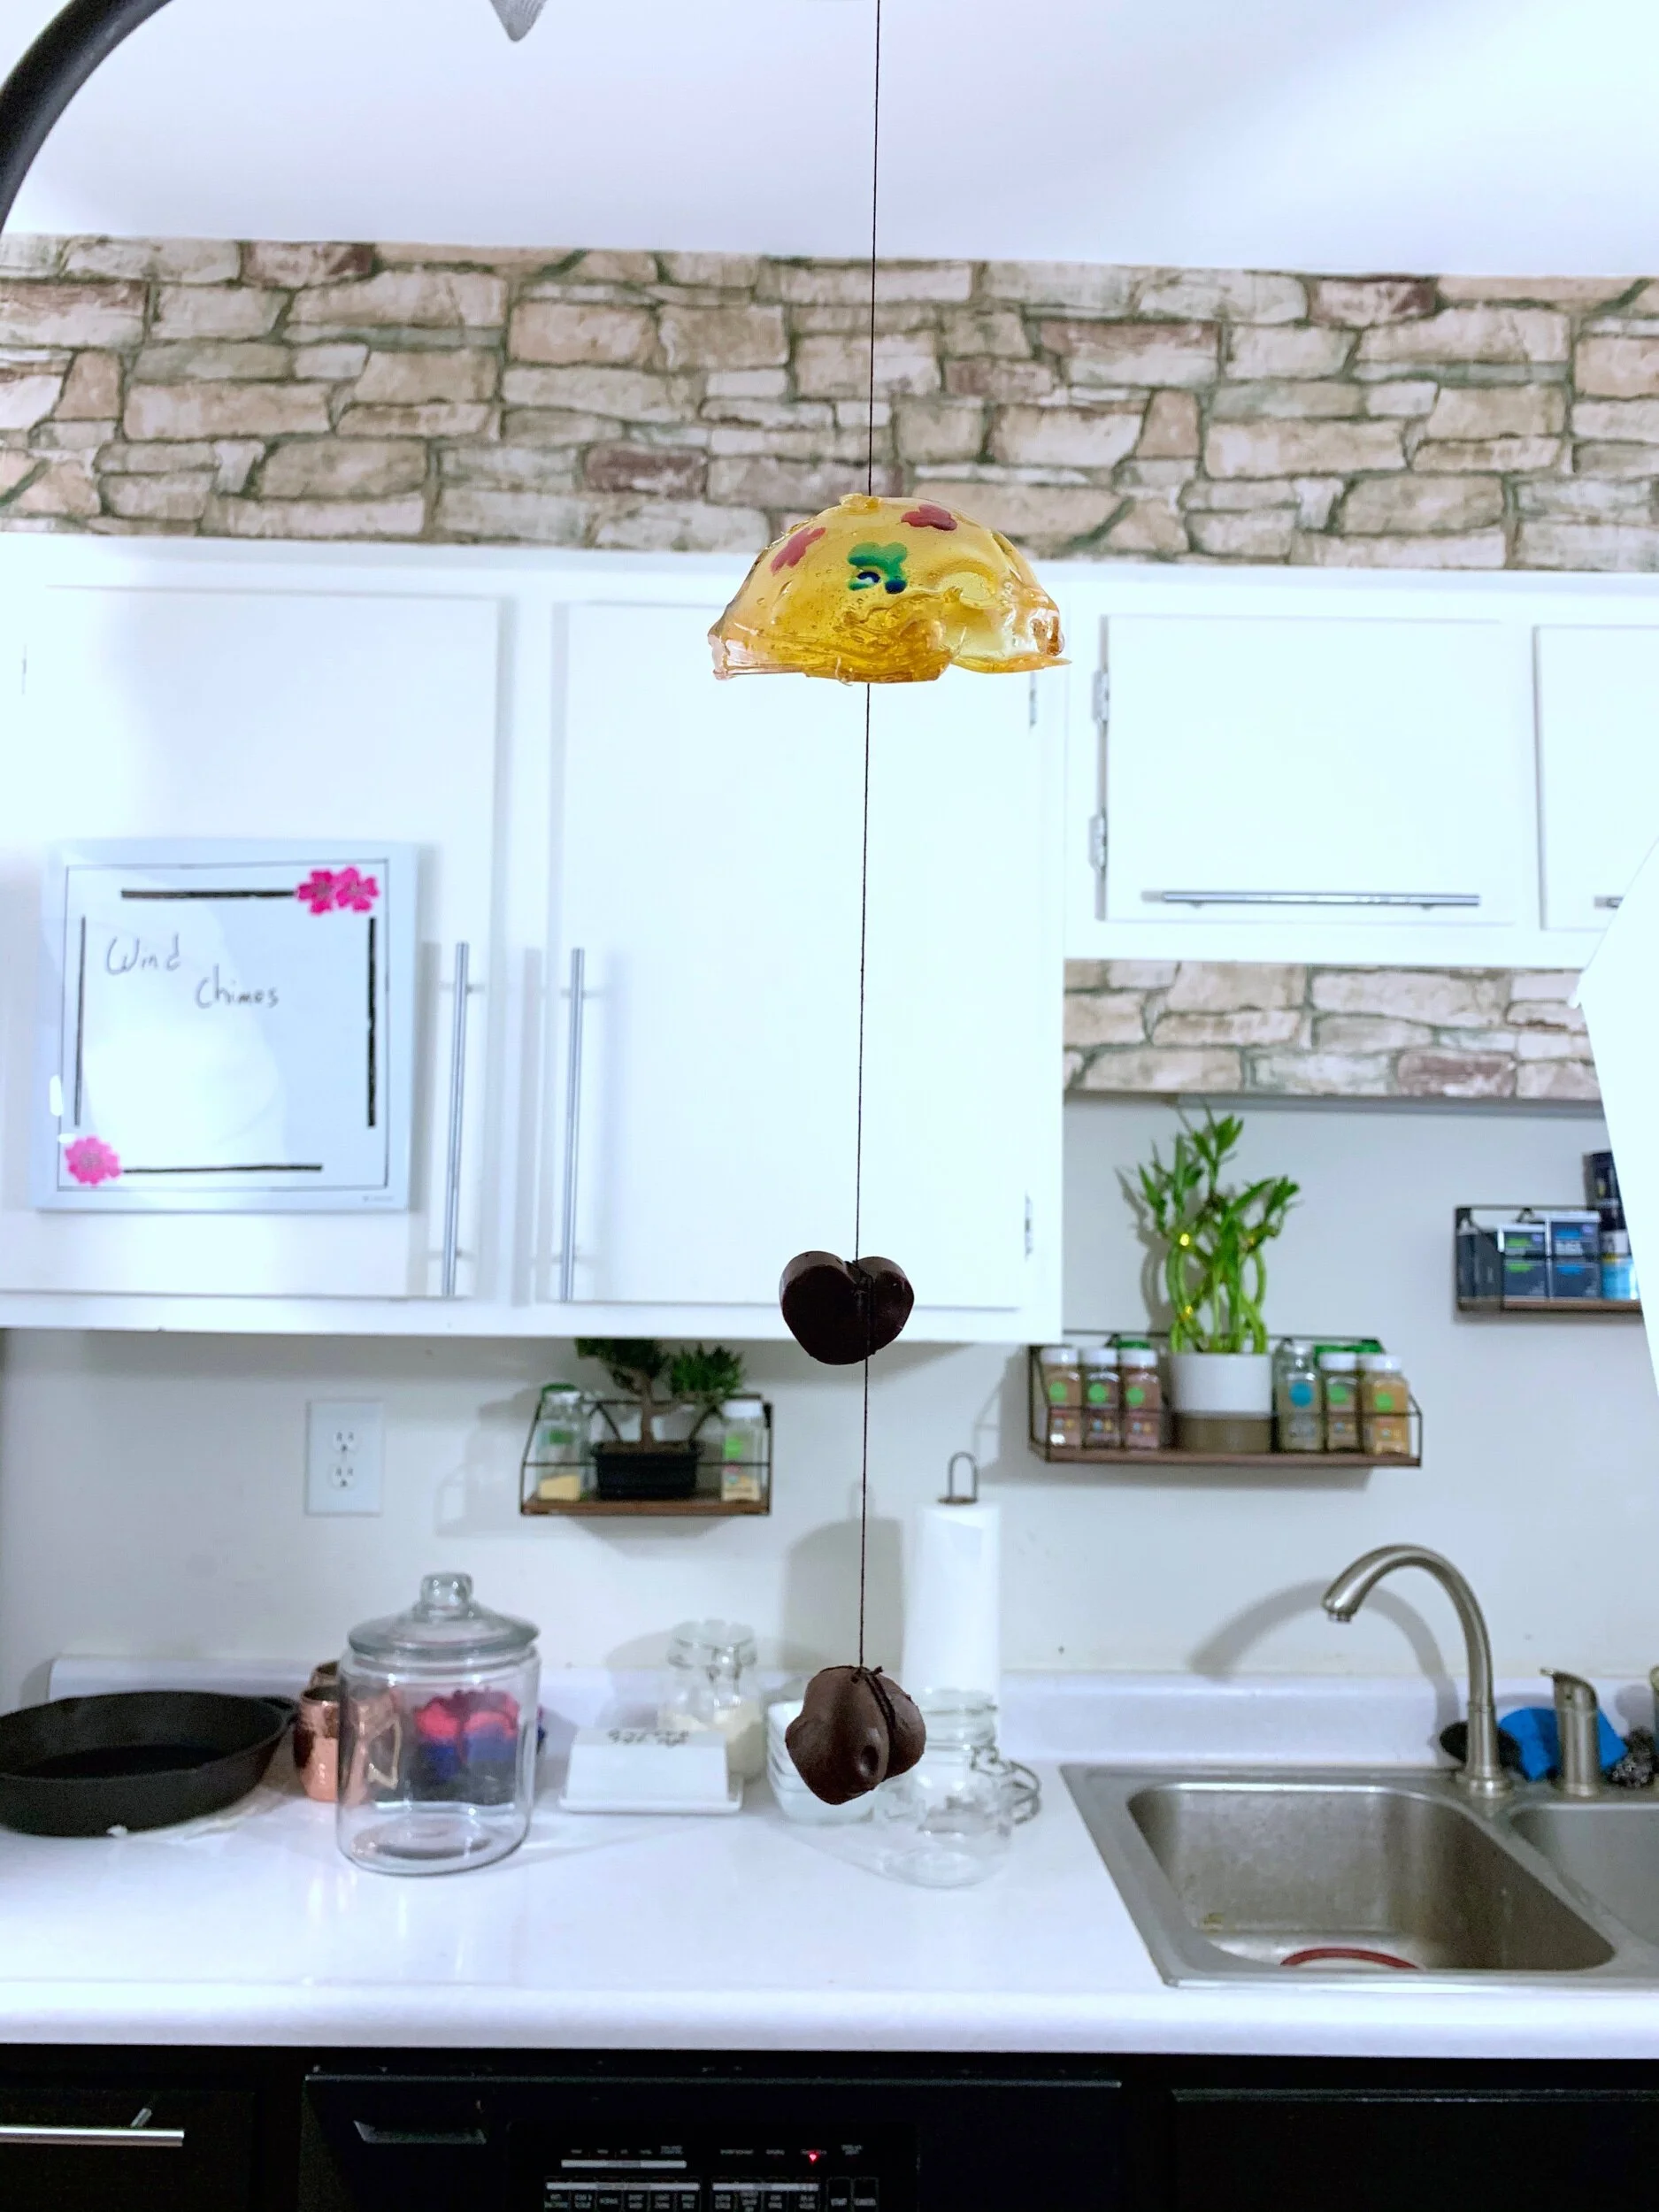
Candy Wind Chime
Prep: 20 minutes Assembly: 10 minutes
This was something I saw drawn in a manga once and I really wanted to make something like it. This is completely for show more so than for eating but it just worked out better than expected, while not as clean or good as it could. I based my design on the simplistic Japanese wind chimes.
Ingredients
2 oz baking chocolate
1/2 and 2 tbls sugar
2 tbls water
2 tbls + 2 tsp light corn syrup
Food coloring any color
chocolate mold
needle and thread
toothpicks
dome mold
Prep


Boil water and add a bowl on top
Add chocolate to melt it
Break the toothpicks, use cooking spray or oil to grease them, and balance two inside the chocolate mold upright (inside however many you want to use)
Pour chocolate around the toothpicks, this should create holes in the chocolate. I didn’t do this the first time and learned chocolate breaks if you try to pierce it
Add to the freezer to chill and harden
In a dry pot, add the sugar, water and corn syrup
Boil and use a candy thermometer to get it to Hard Crack which is around 146 to 154 °C (295 to 309 °F) My thermometer has it on the numbers so I cheat
Remove to a bowl and spoon over the dome of the dome molds
Use spoon and more to make sure it doesn’t pool around the bottom and covers it entirely. You can’t adjust after it hardens as I learned.
Use a tooth pick before it dries and hardens to make a small hole on top for threading
Allow to harden and cool fully
Add the food coloring to a bowl and use a paintbrush to add designs to the dome
Remove the chocolate from the freezer and remove from the molds
Carefully try to remove the tooth picks. Mine were not fully though the chocolate and gave me problems. Honestly, you might want to remove while the chocolate is still soft but not going to fill in the space
Thread through the holes and line up all pieces one on top of the other. Tie off on the bottom one with extra thread to the top. Be careful as the chocolate will want to melt in your hands. I held a freezer pack before hand to help chill my fingers.
Break a small bit of tooth pick and wrap the string around it so it lays horizontal to the thread
Carefully remove the sugar candy dome from the mold
Thread through the hole so that it will rest on the toothpick
Tie the top in a circle to hang
Afterthoughts

I didn’t really make this to eat but while I still had issues and more lessons to learn, this still came out in a fun way and I’m proud of the result. This is more showy to impress people and will last a while. A lot of fun to make and display.